(click images for better view)
Because the direct drive of the first
robotoy was hard to control and consumed current like nothing
else, another attempt would need gearing. I didn't have the time
or patience to construct something from scratch, so I looked around
for an inexpensive flexible platform to use. Fortunately, Pololu
has several
options available. Although the pieces are already fabricated,
you assemble enough (e.g. the gearbox, coaster, mountings, etc.)
to feel satisfied that you are constructing something rather than
just purchasing it. The pieces are precision made, and Pololu laser
cuts their own custom base which fits the drive system well. This
is a very nice touch, and results in a well constructed affordable
platform. This is kind of a DIY Boe-Bot
with great flexibility and extensibility at 1/5 the cost. It took
only a few hours of assembly and contains no duct-tape. Of course,
tweaking software will take considerably longer, but that is part
of the fun.
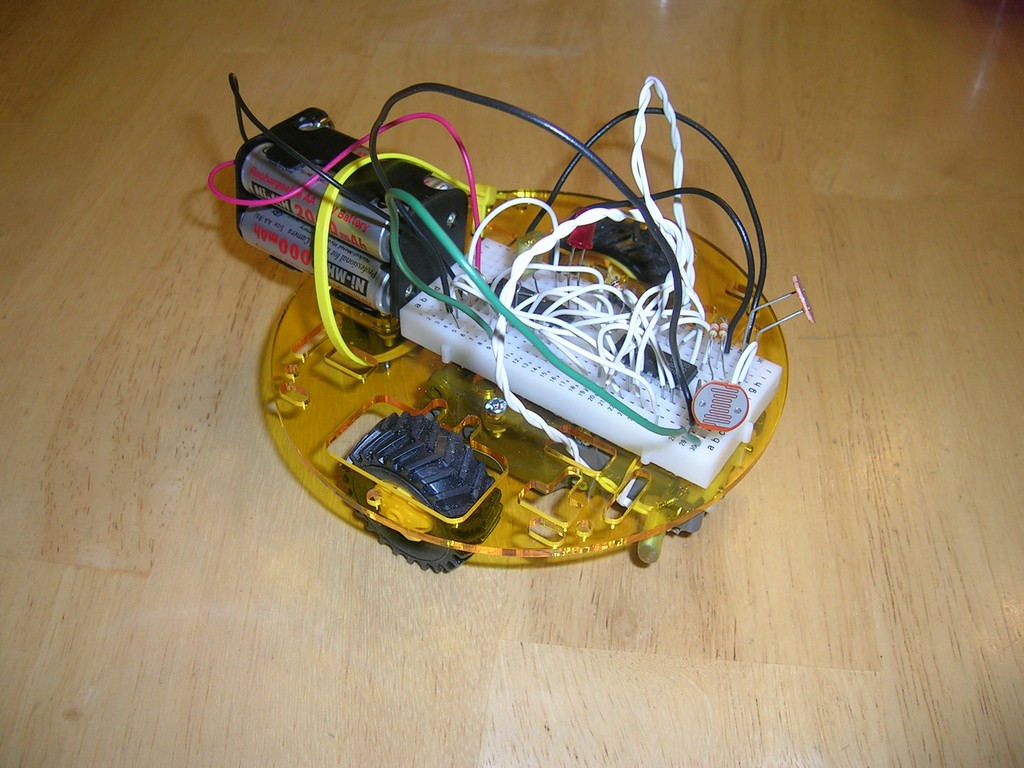
Chassis Components
The chassis consists of:
- base plate1 - a round plastic disc available in multiple colors,
contains miscellaneous holes in it for mounting other components
- twin motor drive kit1 - an "assemble it yourself"
Tamiya twin-motor assembly with choice of gearings. Mates well
with the base plate. Remember to solder capacitors across the
motor tabs to reduce noise.
- wheels1 - rubber treaded robot wheels that fit the motor kit
- ball bearing coaster1 - an adjustable ball that rolls in any
direction to provide 3 legged stability in conjunction with the
wheels
- A small solderless breadboard - attached to the base plate
with 2 sided tape, contains the brains and driving electronics
- Battery pack - obviously this depends on what you want to power.
I've used a single supply of 2-4 AA cells (2.6-5.2 volts from
NiMH) with success.
1 purchased from Pololu
Corp
The Electronics
I won't draw a schematic because the electronics are pretty simple
and it should be somewhat obvious how to hook everything together.
In fact, the 3rd picaxe manual titled "Interfacing Circuits"
contains schematics for wiring the L293D and LDRs.
The electronics consist of:
- Picaxe 18A (or 18X) - This microcontroller provides multiple
I/O lines and A/D capability. It is directly programmable from
an RS232 in a simple but powerful basic language, holds a few
hundred lines of code, and costs < $10. I short, it is quick,
cheap, and effective for this project. See my picaxe
page for more thoughts on Rev-Education's clever product line.
It definitely fills a niche.
- L293D - This is a motor driver which works to interface the
logic of the microcontroller with the motor. Basically, each motor
gets 2 logic lines which can drive the motor forward, backward,
or stopped. Using this is easier than discrete elctronics, it
has diode protections, and it provides a convenient control/drive
system. Some crude PWM could be written in software to control
the speed of each motor, but for now this beast is running full
throttle at approximately .7ft/sec.
- Misc resistors - Read through the excellent picaxe manuals and
you'll see that a few resistors are needed for programming the
microcontroller and hooking up analogue sensors.
- A few capacitors - Don't forget to place small caps (.15uF were
used here) as close to the motor tabs as possible and across the
microcontroller supply to reduce electrical noise.
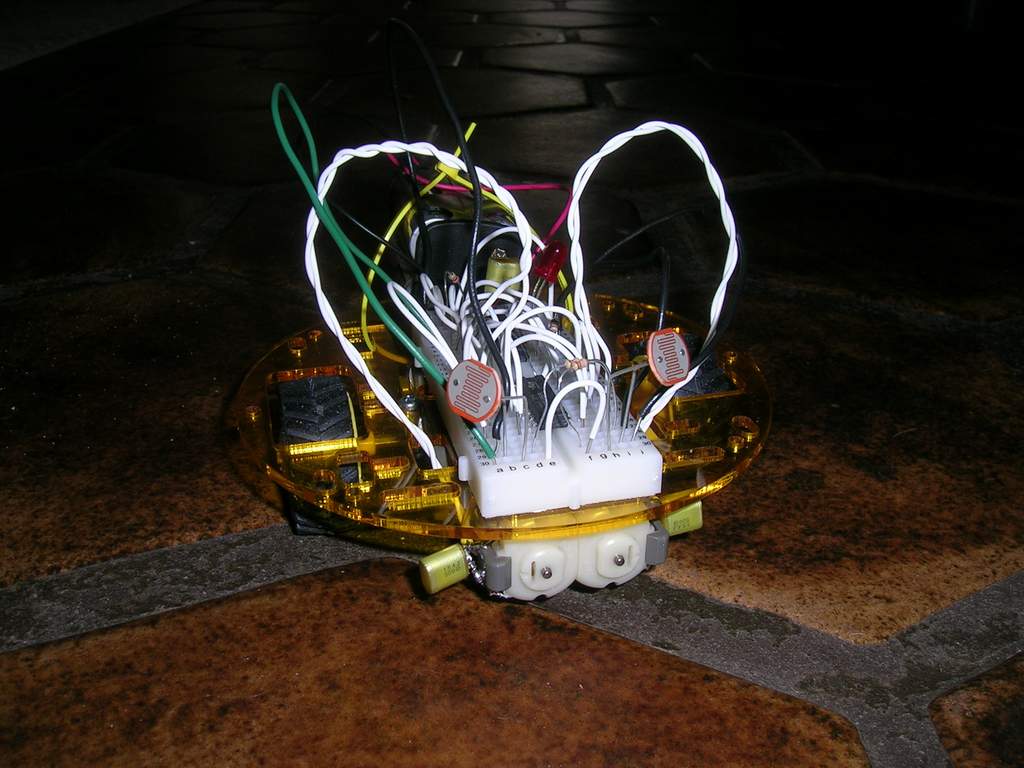
- 2 Light Dependent Resistors (LDRs) - These inexpensive pieces
allow your robot to sense ambient light and turn toward it, or
perhaps to scurry toward the shadows...
The Software
Although this is a very simple platform, the microcontroller is
completely programmable which means you are only limited by your
imagination and the lack of a plasma beam attachment. This
code exercises the motors with all possible combinations of
actions. Notice that the round design allows for "in-place"
rotation. This means that the robot won't get caught on its environment
as it turns to navigate its environment. Roomba anyone?
Add 2 light-dependent resistors (LDRs) for sensors and the obligatory
photovore takes shape. This
simple code takes an ambient light reading from each LDR, turns
toward the sensor with more light, move forward a bit, and loops
back to sensing the light again. Simple but effective, this robot
will follow a flashlight or navigate a sun filled room to avoid
shadows. This is a neat demonstration of digital processing, feedback,
and electromechanics that cost about $35 dollars complete, took
a few hours of time, and is easily adaptable to new sensors.
A Note about Electrical Noise
Did you every notice that many kid's toys use split supplies with
some light AAA's to power the logic and C or D cells to power the
motors? While batteries might seem unimportant to design, if you're
driving a motor with digital logic off the same power supply you should
be warned that electrical noise may wreak havoc in very subtle ways.
On more than one occasion, too much time was wasted investigating
very reproducible but erroneous microcontroller behavior. Some general
rules which may save you considerable time and frustration:
- Put caps as close as possible to the motor terminals
- Put caps across the supply of any digital logic
- Don't run motor and logic power from the same rails, use separate
leads, even though electrically they appear to do the same thing.
Dealing with electrical noise can be a bit of voodoo, so if things
in the digital realm are behaving funny, consider electrical noise
as a possibility before you lose too much sleep.
Future additions
- Power supply sensing - probably the easiest way to do this
is to use a 2.5 volt reference to one of the A/D lines. Since
ADC reading is relative to Vss, the reference will appear to rise
as the Vss drops.
- Solar charging - A photovore which can sense its charge level,
steer its way to a recharge, and then steer away to prevent overcharging
doesn't seem that far off.
Disclaimers
This code is explicitly released under the GPL.
And this page is licensed under a Creative
Commons Attribution 2.5 License.
Write me if you find this project
useful. Link to this page if it is relevant..
Constructing autonomous solar-powered self-repairing sentient platforms
may hasten the demise of our species. This project is provided without
any warranty.
|